I think it's time for me to reveal my fun chair project, even though it isn't completed. I just couldn't contain myself any longer! (Though not as hard to contain as the other secret I am carrying. But all will be revealedwith that next week!)
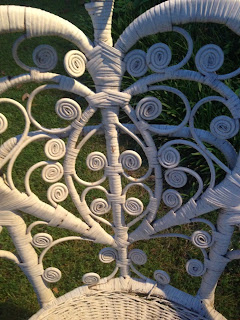
Mom and I were coming out of church choir one Wednesday night when we happened to look over atthe dumpster in the parking lot. Behind it was this beautiful wicker chair. True, it was a little worse for wear but Mom and I immediately saw the potential. We don't know whatthe story was of this poor little chair, but one person's trash (or discarded stolen property) is another man's treasure. We loaded it up in one of our cars and drove back to the house. Plans were already formulating in my mind.
The first step was to scrub the tar out of it. It was dirty and icky, with the white hidden behind a layer of grime. I tore out the irreparable seat, (no one would want to sit on that!) and hosed it down.
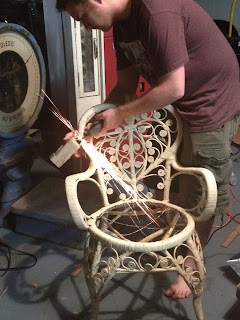
Hubby was all too eager to use one of his power tools to saw off the funny old key box that was on it. **Safety note: when using a grinder or similar tool that produces sparks, it's advised to wear protective gear, such as shoes so you're not doing it barefoot and protective eyewear.**
Here she is all scrubbed up and ready for paint! And here she is painted. It took a can of spray paint (I used an interior/exterior safe spraypaint from Lowes,) and then some. Hubby said I could have used less had I used proper spray painting technique.
My technique: Just holding my finger down on the nozzle and spraying the dickens out of it until everything was covered.
His technique: Followingthe lines of the chair so that excess paint wasn't being wasted on empty space.
I then put on a clear coat of enamel type spray paint that I found in Hubby's man cave.
Voila!
I was thinking this type of fabric to make a seat out of. To do so, I am going to measure the opening of the chair, then cut a fitting round piece out of a piece of plyboard. I will then get some foam (which you can get at any fabric store) and fashion a cushion to adhere to the wood seat. I will take my fabric, place the center of it on top of the seat cusion, and pull tight, stapling it around the bottom ring of the wooden disk. After it'sstapled all the way around, just cut the excess off the bottom and put it in the frame of the chair!
Really, this matches nothing in our house. I suppose I should have thought of that before I started painting it, but the bright shiny red can of spray paint on the shelf was calling my name! Maybe it will be an outside chair. If that's the case, then I hope to find the vinyl, outdoor table cloth type of fabric to cover the seat with.
I promise that as soon as I get around to making the seat cushion, that I will put it on here. Right now our secret project is taking up so much of our time that all we do is come home and fall straight into bed.


No comments:
Post a Comment